After singing the praises of my old Specialized Sequoia-based light touring bike in a previous posting (see What Works for Me), it seems odd that I should now be talking about “retiring” it to use just for local riding, but after my experience on the Amish Country Adventure (also the subject of a series of posts), I decided that I really needed to go with a lighter, more nimble bike. I started looking around at various brands to narrow down my choices, but then realized that I already owned a somewhat overlooked bike that had about everything that I wanted.
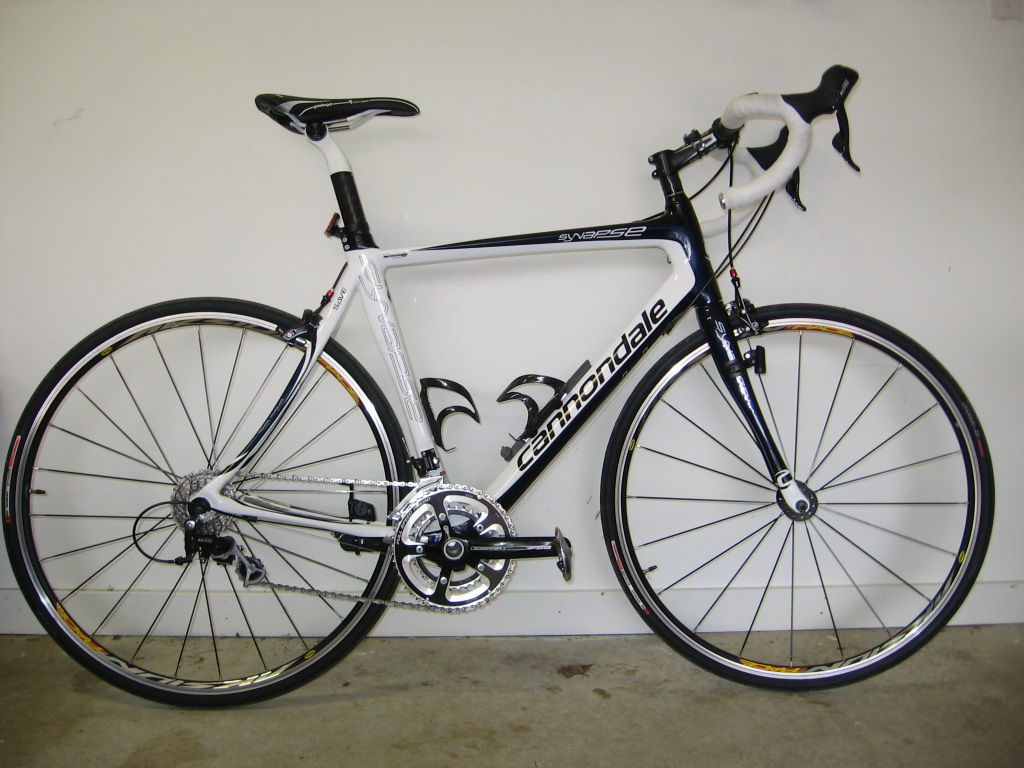
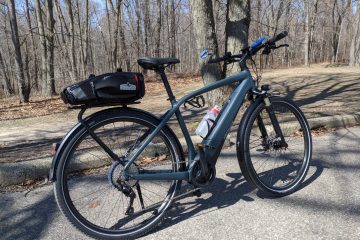
When I retired a few years back and was trying to decide what activities I’d spend more time on, I decided to get a lightweight, carbon-frame bike so that I could keep up with some of my riding friends and also enter a few duathlons. The bike I ended up with was a 2010 Cannondale Synapse with a compact double (50/34) crank and Shimano 105 drivetrain components with a 12-27 10-speed cassette. As it turned out, I have only entered one duathlon with it so far, and basically had not gotten much use out of it since it seemed less convenient to ride than the Sequoia (higher gearing, no rack for a bag, no kickstand, etc.).
I had since made my usual sequence of annual upgrades, including my old standby Brooks B-17 saddle; 105-series brake calipers replacing the OEM Tektros; a 12-32 cassette for that extra climbing ability; and a set of ProWheelbuilder wheels with H+Son rims, Sapim spokes, White T-11 hubs, and 700x25c GP4000s tires. This made the bike a lot more fun to ride, but I still thought of it only as something to ride fast on local MUPs and roads.
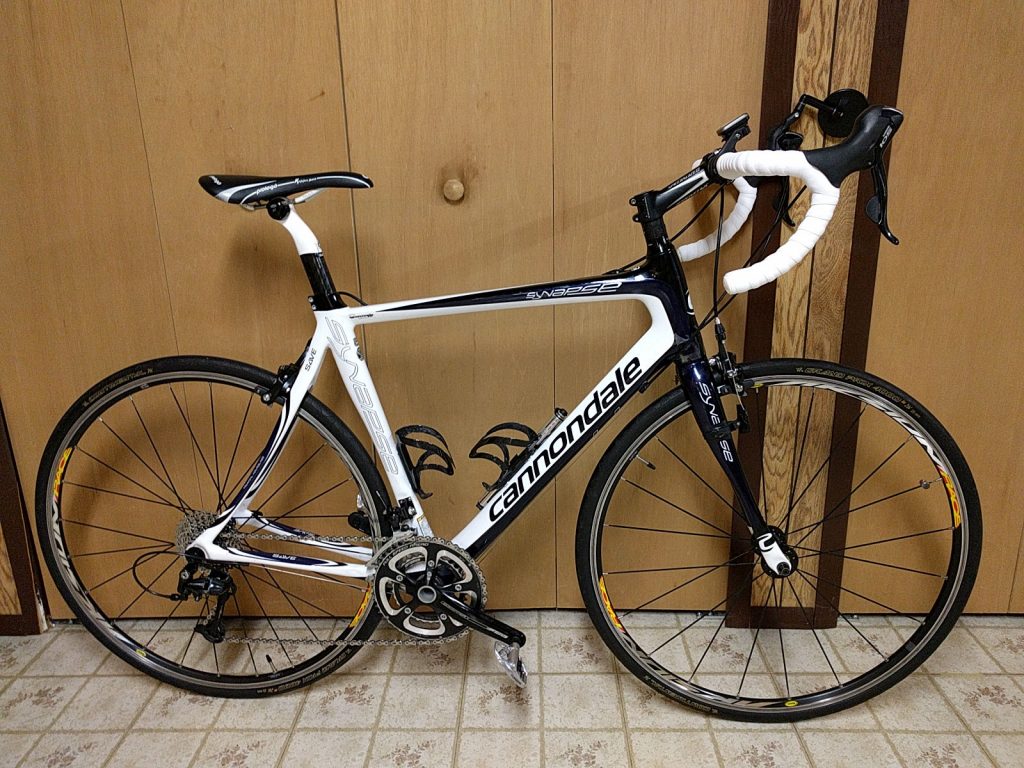
But after my experience on those Amish Country hills, I decided to find out if the bike would really work for me on a multi-day tour, so that’s what I rode on the Amishland and Lakes tour in late July 2015. Well, the bike performed beautifully and just seemed more suitable than the old aluminum mount would have been. I even learned to live without a kickstand! This was obviously a better solution than springing for a new bike and starting over from scratch, especially since by this time I had found an excellent solution to the rear rack issue. Read on to see what I have done to effectively repurpose the bike for its future duties.
SRAM 12-36 Cassette
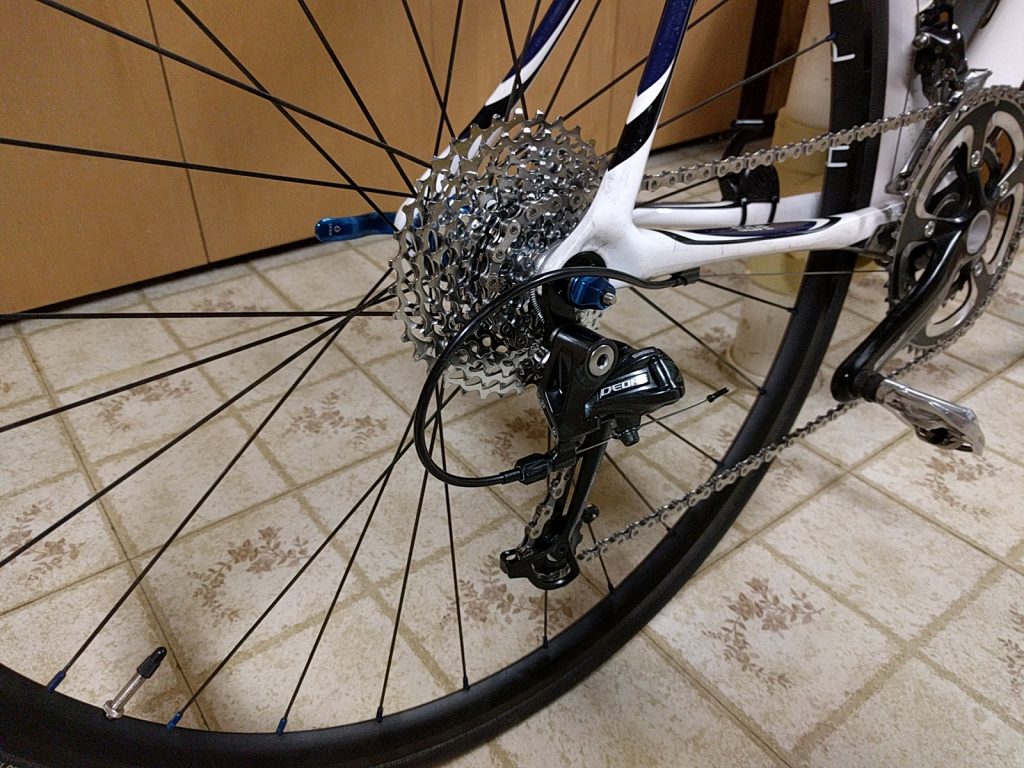
This was probably not necessary for 95% of my riding, but will come in handy if I do another ride in northeast Ohio, or even in northwest Michigan where there are some formidable hills. Shimano does not make a 10-speed cassette with this spread, but the SRAM components are compatible for this purpose. I had already replaced the 105 rear derailleur with a Deore MTB derailleur in order to handle the increased slack due to the gear spacing.
The only real disadvantage is that I have lost the nice, close-ratio shifting of a 12-27 type cassette, making it harder to find just the right gear combo in some situations, but I’ll have to try it to see how much of a difference it makes. This is one advantage of an 11-speed setup, and I notice that many new multi-purpose road bikes now come standard with a 50-34 crank and 12-32 11-speed cassette.
I might mention that I picked up this idea by observing the bike that one of last year’s Amish Country tour leaders rides. He’s a much stronger rider than I am, so I’m not being that much of a wimp with the big “granny gear.”
Arkel Randonneur Rear Rack
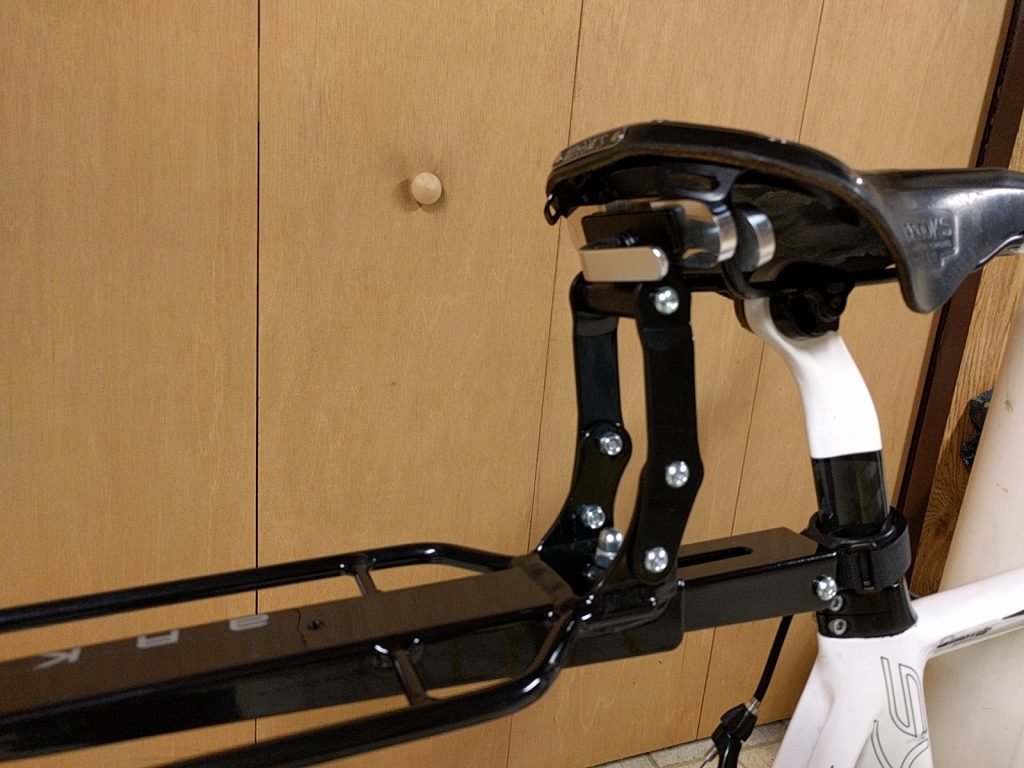
I can’t help myself: I really need to be able to take a decent-sized pack along on long rides, especially when there’s no choice about riding in bad weather. The problem with a carbon-frame bike is of course that there are no rack mounts built in. This leaves the best option to be a seatpost-mounted rack except for two problems: for one thing, many carbon posts (including mine) do not have a round cross-section, making it hard to get a clamp to work, and on top of that it is not recommended to put that type of cantilevered load on a carbon seatpost. Also, I know from experience that even when a seatpost rack is correct attached, it can tend to shift around and become quite annoying to deal with.
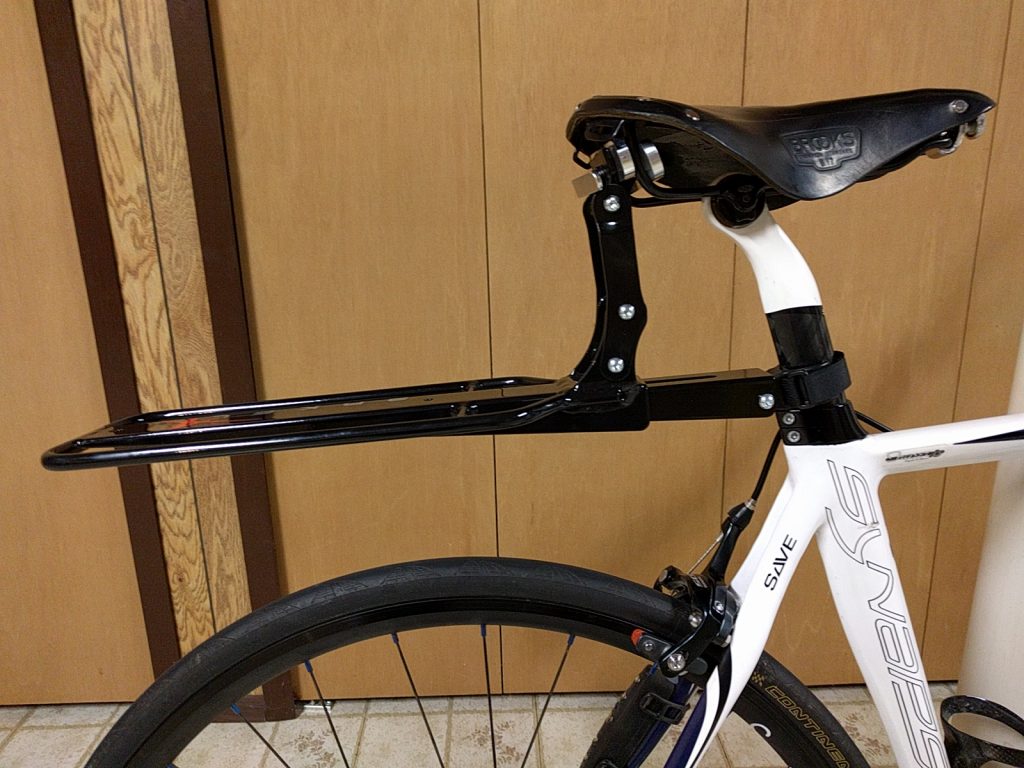
This had me stymied (and was one reason for not considering using this bike) until I discovered this nicely-engineered “randonneur rack” from Arkel. It very cleverly attaches with a quick-release clamping mechanism to the seat rails. It is supported below by a velcro attachment to the seatpost, but this does not put the same bending load on the post as does a clamp-mounted rack. In addition to purchasing the rack, I also required an alternate clamp that is made specifically to mount on a Brooks saddle with its wider rail spacing. This is the sign of a company that knows its customers!
The basic rack also includes a set of extenders to allow the rack to sit lower on the bike. It’s always better to carry loads as low as possible, so I used the extenders to get the rack optimally positioned. Plus I think it looks better this way. I have several bags that will attach to this rack using typical velcro straps and can thus tailor my “luggage” to the needs of the ride.
Arkel TailRider Trunk Bag
When getting the rack, it also looked like Arkel’s TailRider would complement it as a more stylish trunk bag than the older, cheaper bags that I’ve been using. Indeed, it looks very nice on the bike and has some well-designed features, but I’m afraid it might be a bit of a case of “form over function” when it comes to overall practicality.
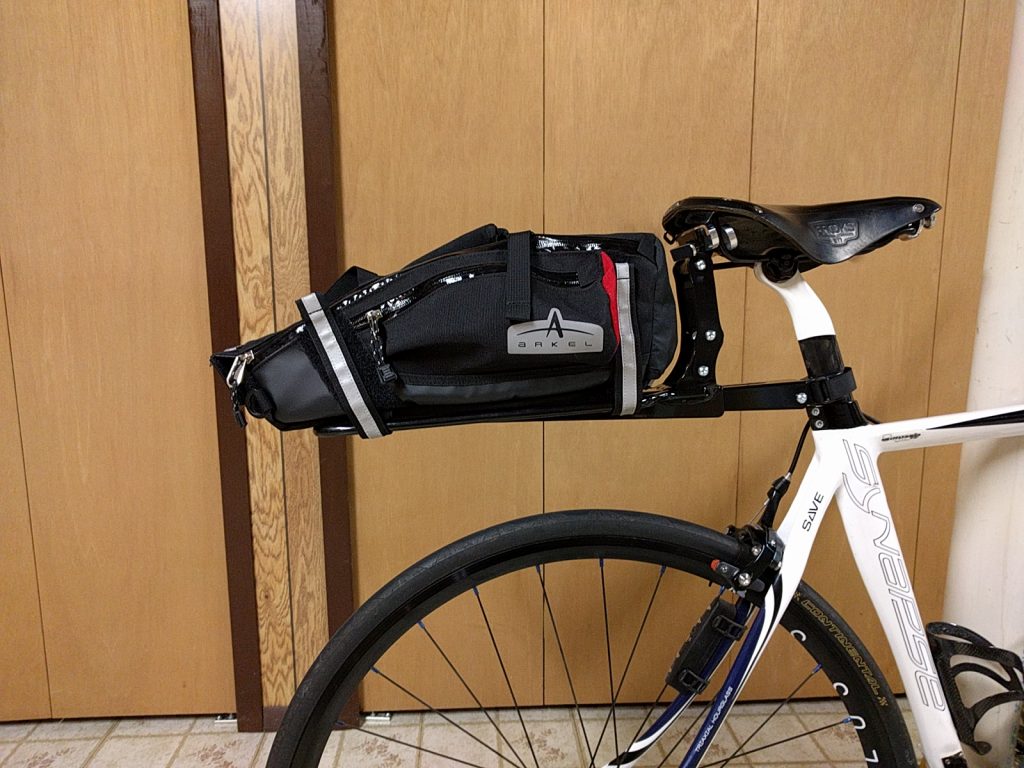
First off, I’m not sure if there’s any benefit to “streamlining” the shape of a trunk bag. But doing so with this bag definitely reduces the usable space inside as the height tapers toward the rear. The other issue is that the bag is touted as made to expand “sideways” instead of expanding to an increased height. The expansion is controlled by a couple of straps across the top, but then when you unzip and open the top of the bag, the contents tend to push out to the sides, making it a bit more difficult to keep things in place. Another minor quibble is that, for some reason, they made the attachment straps a lot longer than it seems they need to be.
In its favor, there are a number of mesh pockets along the inner sides, making it easier to store smaller items without having them sliding around. There’s also a nice built-in rain cover. Arkel does have a video on their site demonstrating just how much you can pack into one of these, but on the whole I’d rather have a stiffer-sided bag with a vertical expander.
Ride Report
I’ll follow up back here in a few months after I have a chance to actually use these products in a variety of conditions.
0 Comments